
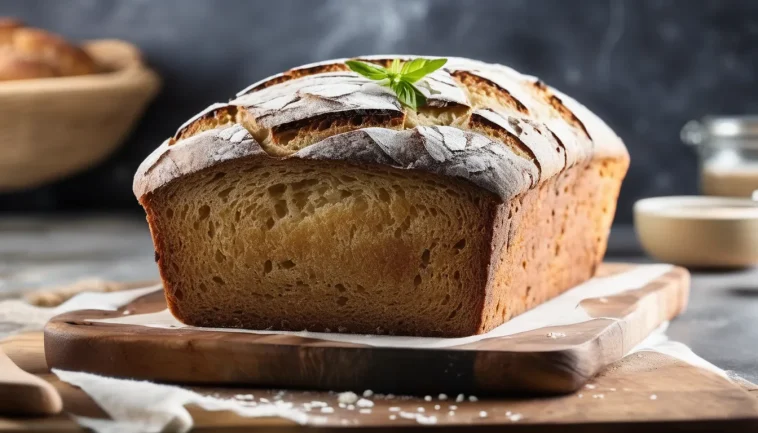
Gluten Free Sourdough bread has a rich history that dates back thousands of years. Originally created by ancient civilizations as a method of fermentation, sourdough has evolved into a beloved staple around the world. In recent years, the gluten-free movement has inspired many to adapt this timeless recipe, allowing those with gluten sensitivities to enjoy the unique tang and texture of sourdough.
Why I Love Gluten Free Sourdough Bread
I adore this gluten free sourdough bread because it brings together the best of both worlds: a delightful tangy flavor and a crusty exterior, all while being accessible to those avoiding gluten. The process of nurturing a sourdough starter is incredibly rewarding, as it connects you to the ancient traditions of bread-making. Each loaf is a labor of love, and the aroma of baking fills the kitchen with warmth and nostalgia.
Additionally, this recipe allows for creativity and experimentation. I love that I can infuse different flavors into the bread or modify it based on seasonal ingredients. Each bake is a unique expression, making it a special treat for both family and friends. The joy of sharing freshly baked gluten-free sourdough is unmatched, and it fosters a sense of community around the table.

Serving Suggestions For Gluten Free Sourdough Bread
Gluten free sourdough bread is not just a delicious standalone treat; it also pairs wonderfully with a variety of toppings and preparations. Here are some serving suggestions to enhance your experience:
- Classic Avocado Toast: Top a warm slice of sourdough with smashed avocado, a sprinkle of salt, and a drizzle of olive oil. This simple yet flavorful dish makes for a nutritious breakfast or afternoon snack.
- Grilled Cheese Sandwich: Use this bread to create a gooey grilled cheese sandwich. The crispy crust and soft interior provide the perfect base for your favorite cheese, creating a comforting classic.
- Bruschetta: Slice the bread and toast it lightly, then add a mixture of diced tomatoes, basil, garlic, and balsamic vinegar. This refreshing appetizer highlights the bread’s texture and is perfect for gatherings.
- French Toast: Dip slices of sourdough in an egg mixture and cook until golden brown. Serve with maple syrup or fresh fruit for a delightful brunch that the whole family will love.
These serving suggestions showcase the versatility of gluten-free sourdough, allowing you to enjoy it in a variety of delicious ways!
Variations For Gluten Free Sourdough Bread
Getting creative with your gluten free sourdough bread can lead to exciting new flavors. Here are some variations to consider:
- Herb Infused: Add dried herbs like rosemary or thyme to the dough for an aromatic twist that pairs beautifully with soups and stews. This variation enhances the flavor profile, making it perfect for savory dishes.
- Seeded Bread: Incorporate sunflower seeds, flaxseeds, or sesame seeds into the dough for added crunch and nutrition. This not only boosts the bread’s texture but also provides a delightful nutty flavor.
- Sweet and Spicy: Mix in a tablespoon of honey or maple syrup along with a pinch of cinnamon for a subtly sweet version that’s perfect for breakfast. This variation transforms the bread into a delicious morning treat.
- Cheesy Delight: Fold in shredded cheese, such as cheddar or mozzarella, to create a savory loaf that is fantastic on its own or as a side to meals. The melty cheese adds a rich flavor that everyone will enjoy.
These variations invite you to experiment with your gluten free sourdough bread, allowing for a unique twist every time you bake!

Storage and Shelf Life For Gluten Free Sourdough Bread
Proper storage is essential to keeping your gluten free sourdough bread fresh and delicious. Here are some tips to help you extend its shelf life:
- Room Temperature: Store the bread in a paper bag or wrapped in a clean kitchen towel at room temperature. This method keeps the crust crispy and allows it to breathe, ideally lasting up to 3 days.
- Freezing: For longer storage, slice the bread and place it in an airtight container or freezer bag. It can last up to 3 months in the freezer. When you’re ready to enjoy it, simply toast the slices directly from the freezer for a quick and easy treat.
- Avoid Plastic: Avoid wrapping the bread in plastic wrap, as this can make the crust soggy and diminish its texture. Choose breathable materials instead to maintain quality.
- Reviving Stale Bread: If your bread starts to lose freshness, you can revive it by lightly spritzing it with water and warming it in the oven for a few minutes. This will help restore its crustiness.
By following these storage tips, you can ensure that your gluten free sourdough remains fresh and enjoyable for as long as possible!
Health Benefits Of Gluten Free Sourdough Bread
Gluten-free sourdough bread not only satisfies your taste buds but also offers several health benefits that make it a smart choice for those with dietary restrictions. Here are some advantages:
- Digestibility: The fermentation process in sourdough breaks down gluten proteins and makes the bread easier to digest, which can be beneficial for individuals with gluten sensitivities.
- Nutrient Absorption: Sourdough fermentation helps reduce phytic acid, which can inhibit nutrient absorption. This process allows your body to better utilize the nutrients present in the ingredients.
- Lower Glycemic Index: Compared to conventional bread, sourdough typically has a lower glycemic index, which can help stabilize blood sugar levels and provide more sustained energy.
- Probiotics: The fermentation process encourages the growth of beneficial bacteria, contributing to gut health and overall well-being. This makes sourdough a tasty way to support your digestive system.
These health benefits make gluten free sourdough bread not only a delicious alternative but also a nutritious addition to your diet!
Gluten Free Sourdough Bread
Equipment
- Mixing bowl
- Whisk or spoon
- Measuring cups and spoons
- Loaf pan
- Parchment paper
- Kitchen towel or plastic wrap
- Oven
Ingredients
- 3 cups Gluten-free flour blend
- 1¼ cups Water
- ½ cup Sourdough starter
- 1 teaspoon Salt
- 1 tablespoon Honey or sugar
Instructions
- Mix Ingredients: In a large mixing bowl, combine the gluten-free flour blend, salt, and honey (if using). In a separate bowl, mix the warm water with the sourdough starter until well combined.
- Combine: Gradually add the wet ingredients to the dry ingredients. Stir until a thick, sticky dough forms.
- First Rise: Cover the bowl with a kitchen towel or plastic wrap. Let the dough rise in a warm place for about 4–8 hours, or until it has doubled in size.
- Shape the Dough: Once risen, gently punch down the dough and transfer it to a lightly floured surface. Shape it into a loaf and place it into a greased loaf pan.
- Second Rise: Cover the loaf again and let it rise for another 1–2 hours until puffed.
- Preheat Oven: Preheat your oven to 425°F (220°C).
- Bake: Once risen, place the loaf in the preheated oven and bake for 40–50 minutes, or until the crust is golden brown and the bread sounds hollow when tapped.
- Cool: Remove the bread from the oven and let it cool in the pan for 10 minutes. Then transfer it to a wire rack to cool completely before slicing.
Related Video
Related Notes
- Starter Quality: Ensure your sourdough starter is active and bubbly before using. A healthy starter will give the best rise and flavor.
- Warm Environment: For optimal rising, keep the dough in a warm, draft-free area. If your kitchen is cool, consider placing it in an oven (turned off) with the light on.
- Humidity: Gluten-free flours can vary in absorbency. Adjust the amount of water if the dough feels too dry or too wet.
