

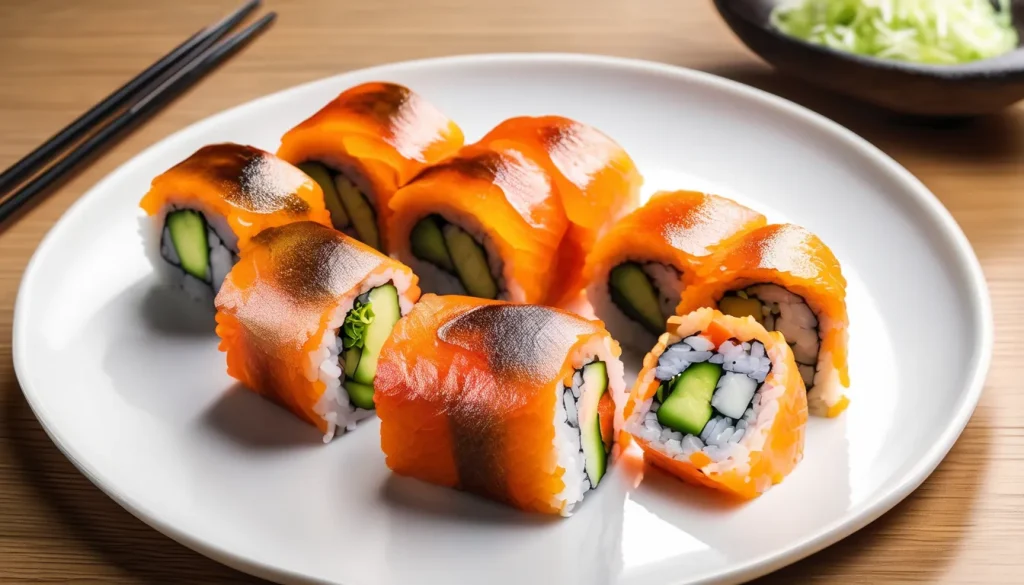
Oshinko rolls are a delightful Japanese sushi creation that showcases the beauty of pickled vegetables. The word “oshinko” refers to the various types of pickled vegetables commonly used in Japanese cuisine, which lend a refreshing crunch and vibrant flavor to the dish. Traditionally enjoyed in Japanese homes and restaurants, oshinko rolls encapsulate the essence of umami and balance, making them a staple in sushi menus around the world.
Why I Love Oshinko Roll Recipe
One of the reasons I adore oshinko rolls is their simplicity. The combination of sushi rice and pickled vegetables creates a perfect harmony of textures and flavors. Each bite delivers a satisfying crunch, followed by the delightful tanginess of the pickles. It’s a beautiful reminder that sometimes the simplest ingredients can produce the most delicious results. I also appreciate how versatile oshinko rolls can be; they are easy to prepare and can be customized to suit various tastes and preferences.
Another aspect that draws me to this recipe is its cultural significance. Making oshinko rolls is a cherished tradition in many Japanese families, often passed down through generations. Preparing them not only brings a sense of nostalgia but also provides a unique opportunity to connect with Japanese culinary heritage. Sharing these rolls with friends and family feels like inviting them into a small piece of my culture, making every meal a special occasion.
Serving Suggestions For Oshinko Roll Recipe
Oshinko rolls are incredibly versatile, making them perfect for various occasions. Here are four serving suggestions to elevate your dining experience:
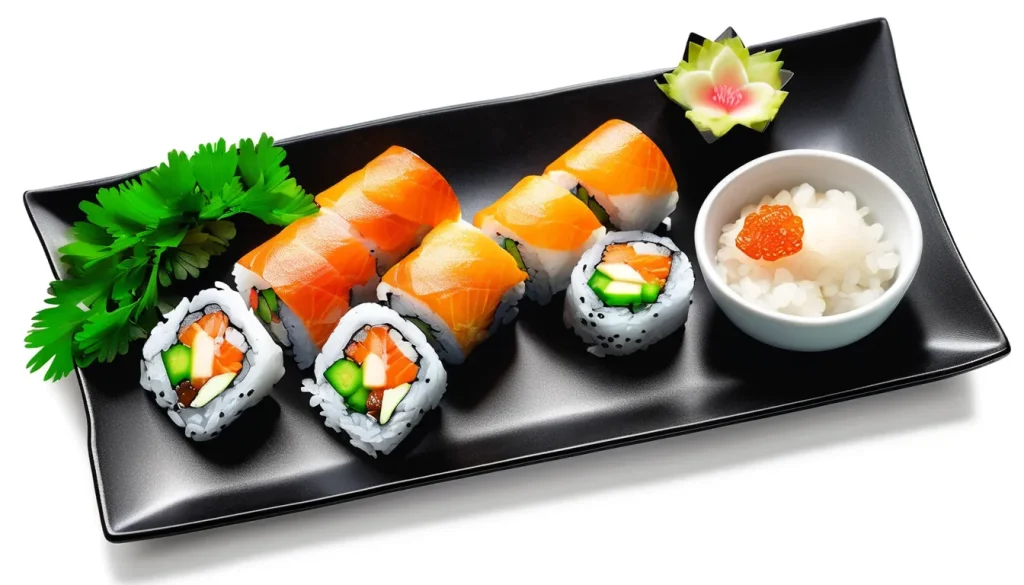
- Sushi Platter: Arrange a variety of oshinko rolls on a beautiful platter alongside other sushi varieties. This colorful presentation makes for an eye-catching centerpiece at any gathering, perfect for impressing guests.
- Side Dish for Grilled Meats: Serve oshinko rolls as a refreshing side dish with grilled chicken or beef. The acidity of the pickles cuts through the richness of the meat, creating a balanced and satisfying meal.
- Lunch Box Delight: Pack oshinko rolls in a bento box with rice, fruits, and other small dishes. They add a pop of color and flavor, making lunchtime exciting and nutritious.
- Appetizer Before a Sushi Feast: Offer oshinko rolls as a light appetizer before a larger sushi meal. Their fresh taste acts as a perfect palate cleanser, setting the stage for the delicious courses to come.
These serving suggestions showcase the versatility of oshinko rolls, making them suitable for any occasion.
Variations For Oshinko Roll Recipe
There are endless ways to customize oshinko rolls to suit your tastes. Here are four exciting variations to try:
- Spicy Oshinko Roll: Add a dash of sriracha or wasabi to the sushi rice for a spicy kick. This variation adds a new layer of flavor that spice lovers will appreciate.
- Vegetable Medley: Incorporate a mix of your favorite pickled vegetables, such as daikon, cucumber, and carrots, to create a vibrant and colorful roll. This medley not only enhances the visual appeal but also adds depth to the flavor profile.
- Avocado Twist: For a creamier texture, include slices of ripe avocado in your roll. The creaminess of the avocado balances the tanginess of the pickled vegetables beautifully.
- Sushi Sandwich: Instead of traditional rolling, flatten the rice and layer the pickled vegetables inside like a sandwich. This unique presentation makes it fun to eat and perfect for picnics.
These variations allow for creativity while staying true to the essence of oshinko rolls, making them even more enjoyable.

Storage and Shelf Life For Oshinko Roll Recipe
To enjoy your oshinko-rolls at their best, proper storage is key. Here are some tips for keeping them fresh:
- Refrigeration: Store the rolls in an airtight container in the refrigerator. This helps retain their crispness and prevents them from drying out.
- Shelf Life: Oshinko-rolls are best consumed within 2 to 3 days. While they can last longer, the texture and flavor may deteriorate over time.
- Separation: If you have leftover pickled vegetables, consider storing them separately. This allows you to roll fresh sushi rice when you’re ready to enjoy them again.
- Freezing: Freezing is not recommended for oshinko-rolls, as it can negatively impact the texture of the rice and vegetables.
By following these storage tips, you can keep your oshinko-rolls fresh and flavorful for as long as possible.
Health Benefits Of Oshinko Roll Recipe
Oshinko-rolls are not just a tasty treat; they also offer several health benefits. Here are some key points to consider:
- Nutrient-Rich: The pickled vegetables in oshinko-rolls are packed with vitamins and minerals, providing essential nutrients in each bite.
- Gut Health: The fermentation process of pickling promotes the growth of beneficial bacteria, aiding digestion and supporting gut health.
- Low in Calories: These rolls are a light option, making them suitable for those looking to maintain or lose weight without sacrificing flavor.
- Energy Boost: The sushi rice offers a source of carbohydrates, providing sustained energy throughout the day.
Incorporating oshinko-rolls into your diet not only delights your taste buds but also contributes positively to your overall health!
Oshinko Roll Recipe
Equipment
- Bamboo sushi mat
- Sharp knife
- Rice cooker
- Mixing bowl
- Plastic wrap
- Airtight container
Ingredients
- 1 cups Sushi Rice
- 2½ cups Water
- 3 tablespoons Rice Vinegar
- 2 tablespoons Sugar
- 1 teaspoon Salt
- 1 cup Pickled Daikon
- 1 cup Pickled Cucumber
- 4 sheets Nori Sheets
- 2 tablespoons Sesame Seeds
Instructions
- Prepare the Sushi Rice:Rinse the sushi rice under cold water until the water runs clear. In a rice cooker or pot, combine the rinsed rice and 2 ½ cups of water. Cook according to the rice cooker instructions or bring to a boil, then reduce heat, cover, and simmer for about 20 minutes until cooked.
- Season the Rice:In a small bowl, mix the rice vinegar, sugar, and salt until dissolved. Once the rice is cooked, transfer it to a mixing bowl and gently fold in the vinegar mixture. Allow the rice to cool to room temperature.
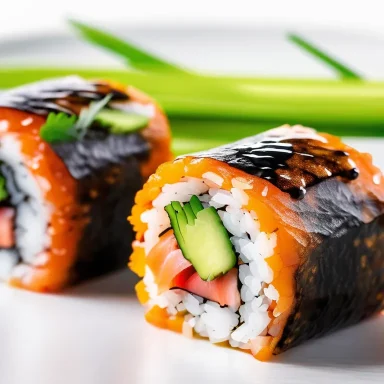
- Prepare the Nori:Place a sheet of nori on a bamboo sushi mat, shiny side down.
- Assemble the Roll:Wet your hands to prevent sticking, then take a handful of sushi rice and spread it evenly over the nori, leaving about 1 inch of space at the top. Lay the pickled daikon and cucumber in a line across the center of the rice. (Optional) Sprinkle sesame seeds over the vegetables for added flavor.
- Roll the Sushi:Using the bamboo mat, carefully roll the nori away from you, applying gentle pressure to form a tight cylinder. Seal the edge of the nori with a bit of water.
- Slice the Roll:Use a sharp knife to slice the roll into 6-8 pieces. Wipe the knife with a damp cloth between cuts for cleaner slices.
- Serve:Arrange the oshinko rolls on a plate and enjoy them as is or with soy sauce for dipping.
Related Video
Related Notes
- Rice Consistency: Make sure to rinse the sushi rice thoroughly to remove excess starch, which can make the rice gummy. The right consistency is sticky but not mushy.
- Vinegar Mixture: Allow the seasoned rice to cool to room temperature before rolling. Hot rice can cause the nori to become soggy.
- Nori Quality: Use high-quality nori sheets. Look for those labeled “sushi nori” for the best flavor and texture.
