

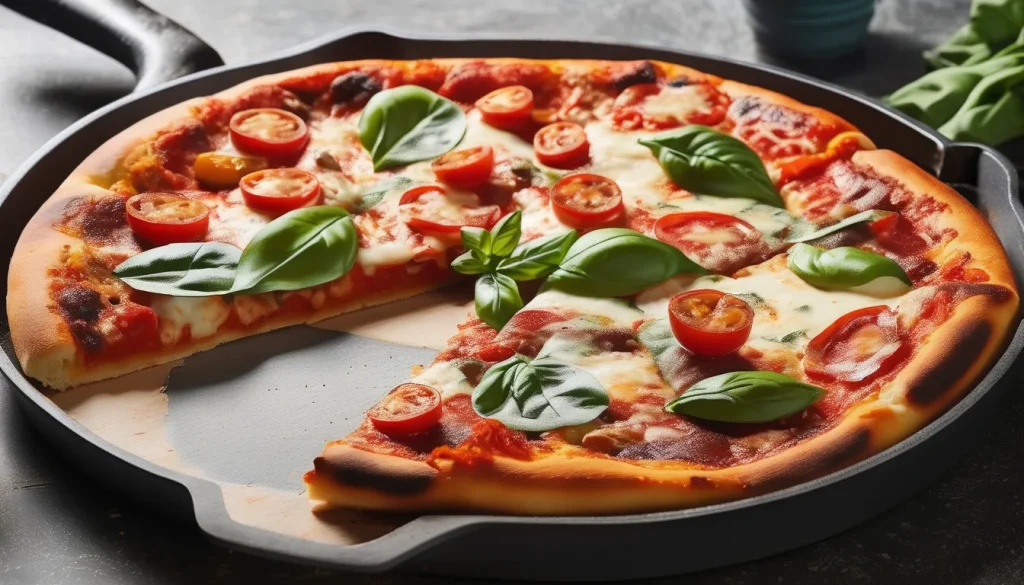
Handmade pan pizza is a delicious and satisfying dish that hails from the Italian tradition of baking pizza in a deep, oiled pan. This method allows for a thick, airy crust that is crispy on the outside and soft on the inside. Originating in places like Detroit and Chicago, this style of pizza has gained popularity for its unique texture and ability to hold a variety of toppings, making it a favorite among pizza lovers everywhere.
Why I Love This Handmade Pan Pizza Recipe
I love this recipe for its simplicity and the joy it brings to gathering with friends and family. Making pizza from scratch allows me to experiment with flavors and toppings, creating a personalized dish that everyone can enjoy. There’s something special about kneading the dough and watching it rise, knowing that it will soon become a delicious meal.
Additionally, handmade pan pizza is incredibly versatile. Whether I’m in the mood for classic Margherita, loaded with veggies, or a meat-lover’s delight, the possibilities are endless. It’s a great way to involve everyone in the cooking process, allowing each person to customize their slice just the way they like it. This makes for a fun and interactive dining experience that creates lasting memories.
Serving Suggestions For Handmade Pan Pizza Recipe
Handmade pan pizza is perfect for various occasions and can be served in many delightful ways. Here are some serving suggestions to enhance your pizza experience:
- With Fresh Salad: Pair your pizza with a light, refreshing salad dressed in vinaigrette. The crisp greens balance the richness of the pizza, making for a well-rounded meal.
- Dipping Sauces: Serve alongside a variety of dipping sauces like garlic butter, marinara, or ranch. These add an extra layer of flavor and fun, allowing everyone to personalize their slices.
- Beverage Pairings: Complement your pizza with a selection of beverages, such as craft beer, soda, or even a nice red wine. The right drink can elevate the entire dining experience.
- Pizza Party Style: For gatherings, cut the pizza into small squares and set up a toppings bar where guests can add their favorite ingredients. This interactive approach encourages creativity and makes for a memorable meal.
By using these serving suggestions, you can create an enjoyable dining experience that showcases your handmade pan pizza perfectly!
Variations For Handmade Pan Pizza Recipe
Exploring different variations of handmade pan pizza allows for endless creativity in the kitchen. Here are some exciting options to consider:
- Chicago-Style Deep Dish: For a heartier version, layer cheese on the bottom, followed by toppings, and then add sauce on top. This creates a rich and indulgent pizza that’s sure to impress.
- Veggie Lover’s Delight: Load your pizza with a variety of fresh vegetables, such as bell peppers, onions, mushrooms, and spinach. This not only adds vibrant colors but also boosts the nutritional value.
- Meat Feast: For meat lovers, add a combination of pepperoni, sausage, ham, and bacon. The mix of savory flavors and textures will satisfy any craving.
- Dessert Pizza: Get creative by making a sweet version! Use a sugar cookie dough base, spread with Nutella or cream cheese frosting, and top with fresh fruits or chocolate chips for a delightful dessert.
These variations allow you to experiment and enjoy different flavors while keeping the essence of handmade pan pizza alive!
Storage and Shelf Life For Handmade Pan Pizza Recipe
Proper storage of your handmade pan pizza is essential to maintain its taste and texture for later enjoyment. Here are some guidelines to keep your pizza fresh:
- Refrigeration: Any leftover pizza should be stored in an airtight container in the refrigerator. It can last for about 3-4 days, allowing you to savor those delicious slices without losing flavor.
- Freezing: For extended storage, freeze the pizza in individual slices. Wrap each slice in plastic wrap or foil, then place them in an airtight container or freezer bag. Frozen pizza can last for up to 2 months while maintaining its quality.
- Reheating: To reheat, place the pizza slices in an oven preheated to 350°F (175°C) for about 10-15 minutes. This method helps restore the crust’s crispiness and ensures even heating.
- Avoiding Sogginess: If you plan to freeze the pizza, it’s best to freeze it as soon as it has cooled. This prevents moisture from accumulating and keeps the crust from becoming soggy when reheated.
By following these storage tips, you can enjoy your handmade pan pizza for days to come!
Health Benefits Of Handmade Pan Pizza Recipe
Handmade pan pizza can be a nutritious meal option when prepared with wholesome ingredients. Here are some health benefits to consider:
- Nutrient-Rich Toppings: Adding a variety of fresh vegetables as toppings can significantly boost the nutritional content, providing essential vitamins, minerals, and antioxidants that support overall health.
- Whole Grain Options: Using whole wheat flour for the pizza dough increases fiber content, which aids digestion and helps maintain steady energy levels.
- Homemade Control: Making pizza at home allows you to select high-quality ingredients, such as organic cheeses and lean proteins, while minimizing additives and unhealthy fats commonly found in commercially prepared pizzas.
- Customizable Nutritional Value: You can easily tailor the pizza to accommodate dietary preferences or restrictions, making it a more balanced meal for everyone, whether they’re vegetarian, gluten-free, or seeking to reduce sodium.
Enjoying handmade pan pizza not only satisfies your cravings but also gives you the opportunity to create a meal that is both delicious and health-conscious!
Handmade Pan Pizza Recipe
Equipment
- Large mixing bowl
- Measuring cups and spoons
- Rolling Pin
- Baking pan
- Plastic wrap or kitchen towel
- Oven
Ingredients
For the Dough:
- 2½ cups all-purpose flour
- 1 packet active dry yeast
- 1 teaspoon sugar
- 1 teaspoon salt
- 1 tablespoon olive oil
- 1 cup warm water
For the Toppings:
- 1 cup pizza sauce
- 2 cups shredded mozzarella cheese
- 1 cup assorted toppings
- 1 teaspoon dried oregano
- Fresh basil leaves
Instructions
- Prepare the Dough: In a large mixing bowl, combine warm water, sugar, and yeast. Let it sit for about 5-10 minutes until foamy. Then add flour, salt, and olive oil. Mix until a dough forms.
- Knead the Dough: Transfer the dough to a floured surface and knead for about 5-7 minutes until smooth and elastic.
- First Rise: Place the dough in a greased bowl, cover with plastic wrap or a kitchen towel, and let it rise in a warm place for about 1 hour, or until it has doubled in size.
- Prepare the Pan: Grease your baking pan (deep-dish or cast-iron skillet) with olive oil to prevent sticking. Preheat your oven to 475°F (245°C).
- Shape the Dough: After the dough has risen, punch it down and transfer it to the prepared pan. Using your fingers, stretch and press the dough to fit the bottom and sides of the pan.
- Add Sauce and Toppings: Spread the pizza sauce evenly over the dough. Sprinkle shredded mozzarella cheese, followed by your choice of toppings. Add a sprinkle of dried oregano if desired.
- Bake: Bake in the preheated oven for 25-30 minutes, or until the crust is golden brown and the cheese is bubbly and melted.
- Cool and Serve: Allow the pizza to cool for a few minutes before slicing. Garnish with fresh basil leaves if desired. Serve hot and enjoy!
Related Video
Related Notes
- Dough Consistency: Ensure your dough is not too sticky; if it is, add a little more flour while kneading. The right consistency is key for a good crust.
- Rising Time: If you have more time, let the dough rise longer for a more developed flavor. A slow rise in the refrigerator overnight can enhance taste.
- Preheating the Pan: For an extra crispy crust, preheat the pan in the oven before adding the dough. This creates a nice crunch on the bottom.
